Table of Contents
- Why “generate again” quietly costs you
- The one technique behind all of it
- Tool by tool, and what each is best at
- The classic offenders, fixed
- Settings that decide whether a fix looks seamless
- Soft or low resolution overall? Upscale, do not inpaint
- When repairing is the wrong call
- The verdict, after a lot of images
I have thrown away more good images over one bad thumb than I would like to admit. You probably know the exact feeling. The light lands, the pose reads the way you pictured it, the mood is right, and then you notice the left hand has six fingers, or the shop sign in the background spells something that is almost a word but not quite. For a long time my reflex was to hit generate again and hope the next roll kept everything good while quietly repairing the one broken part. It almost never worked. I would get a clean hand and lose the face I loved, or keep the face and watch the whole background drift somewhere else.
After a couple of years of doing this most days across Midjourney, Photoshop, Gemini’s Nano Banana editor and Stable Diffusion, the single biggest change to my output was not a sharper prompt or a newer model. It was learning to stop regenerating and start repairing. Almost any image that is 90 to 95 percent right can be finished in place, in a minute or two, without touching the parts that already work. What follows is the workflow I actually use, the settings that decide whether a fix looks seamless, and the moments where repairing is a waste of time and you genuinely should start over.
Why “generate again” quietly costs you
It helps to understand one thing before any tool talk. A diffusion model does not edit a picture the way you edit a document. It builds the whole image from random noise, guided by your prompt and a seed number. Change the seed and every pixel is negotiated again from scratch. That is why a fresh generation almost never hands back your composition with a single detail swapped. The model has no memory of the image you liked. It is drawing a brand new one and hoping you like that instead.
The 95 percent trap The closer an image is to done, the more you stand to lose by regenerating. One reroll to fix a hand can cost you the face, the light and the framing you already had. Repair beats reroll almost every time the rest of the frame is working.
Diagnose before you touch anything
Fixing the right way starts with naming what is actually wrong. Most flaws fall into a handful of buckets, and each bucket has a first move that leaves the rest of your image alone. Match the problem to the move before you open any tool.
| What is wrong | Best first move | Where |
|---|---|---|
| Extra or fused fingers, broken hand | Mask the hand only and regenerate that region | Inpainting |
| Warped face or eyes at a distance | Mask the face, low to mid strength, or a face restore pass | Inpaint / restore |
| Garbled text or a wrong logo | Mask the text and type the exact words you want | Nano Banana / fill |
| Stray object or extra person | Select it, leave the prompt blank, remove | Fill / remove tool |
| One item the wrong colour | Change that element only, keep the rest identical | Nano Banana |
| Whole image slightly soft or small | Do not inpaint, upscale instead | Topaz / Upscayl |
| Anatomy or perspective broken | Stop patching and regenerate | New generation |
The one technique behind all of it
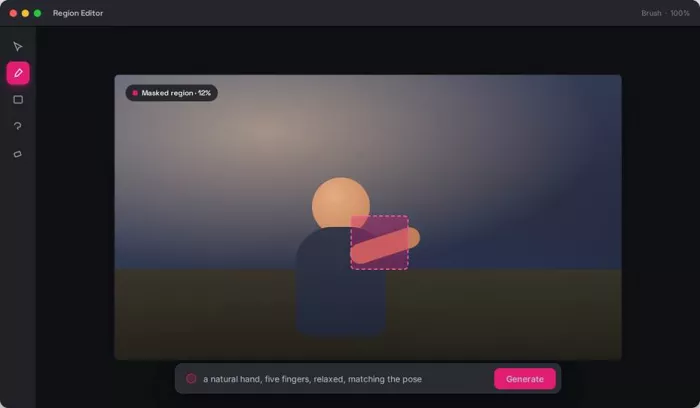
Every fix in this guide is a version of the same idea. You tell the model which part of the image to leave alone and which small part to rethink. In the classic tools you do this with a mask, a shape you paint over the area you want changed. The model regenerates only inside that shape and blends it back into the untouched pixels around it. The newer conversational editors do the same thing invisibly: you describe the change in plain words and the model works out the region for you. Learn the masked version once and every tool afterward makes sense.
Tool by tool, and what each is best at
The same technique shows up under four different names. Here is where each one earns its place, based on the jobs I hand to it most.
MIDJOURNEY
Vary (Region) and the web Editor
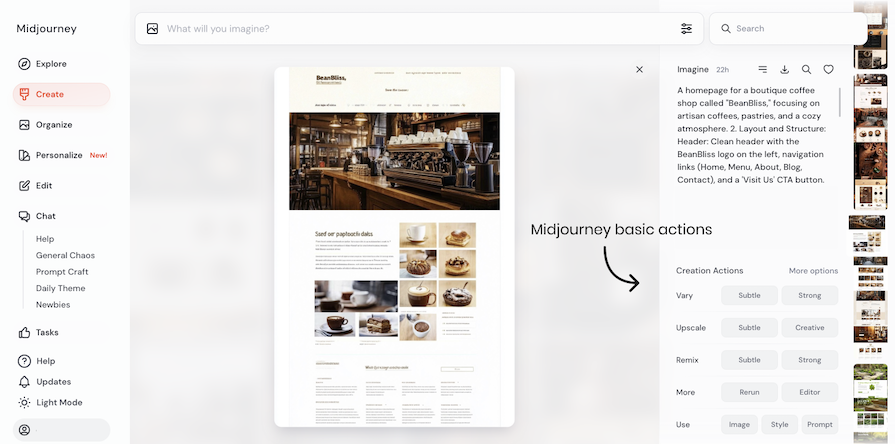
Upscale the image first, then the Vary (Region) button opens an editor with freehand and rectangle selection. Turn on Remix mode in your settings so you can also rewrite the prompt for the selected patch, which turns it into a real inpainting system rather than a shuffle. On the website the same behaviour lives in the Editor as the Erase tool.
Honest limit: it is tuned for meaningful regions, not tiny tweaks. Midjourney suggests selecting roughly 20 to 50 percent of the frame, and if your selection is too small it will refuse to submit.
PHOTOSHOP
Generative Fill and the Remove Tool
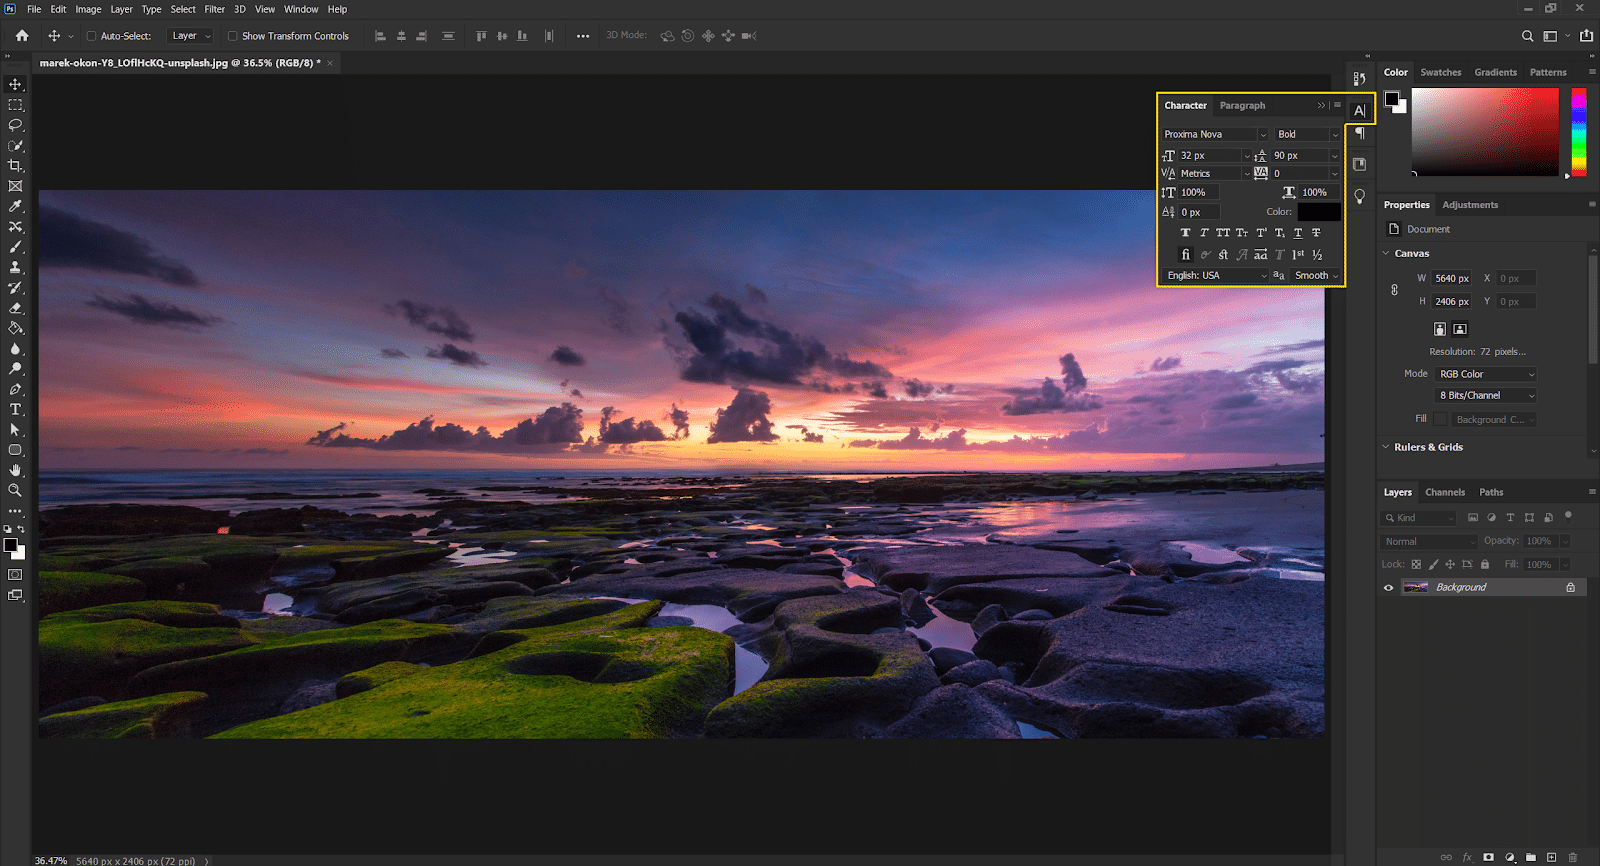
Select the area with any tool, and the Contextual Task Bar pops up. Choose Generative Fill, then type a prompt to add something or leave it blank to remove. Expanding the selection by a few pixels gives cleaner results. The 2025 Remove Tool can now call Firefly to rebuild larger areas, with an Auto mode that decides when to use generation. Each generate lands on its own layer, so nothing is destructive.
Honest limit: it needs a subscription, and a selection drawn too tight against an object can leave a faint seam.
GEMINI · NANO BANANA
Conversational, pixel-level edits

No mask required. Upload the image and describe the change in plain language, for example “change only the red mug to blue and keep everything else identical.” It is built to alter specific elements while preserving the rest, and it holds a person’s or a pet’s likeness across edits. Its text rendering is strong, which makes it my first stop for fixing signs and short labels. Stack changes one at a time across turns.
Honest limit: ask for too much in one turn and it may quietly redraw the whole frame. Change one thing per message.
STABLE DIFFUSION · COMFYUI
The maximum-control route
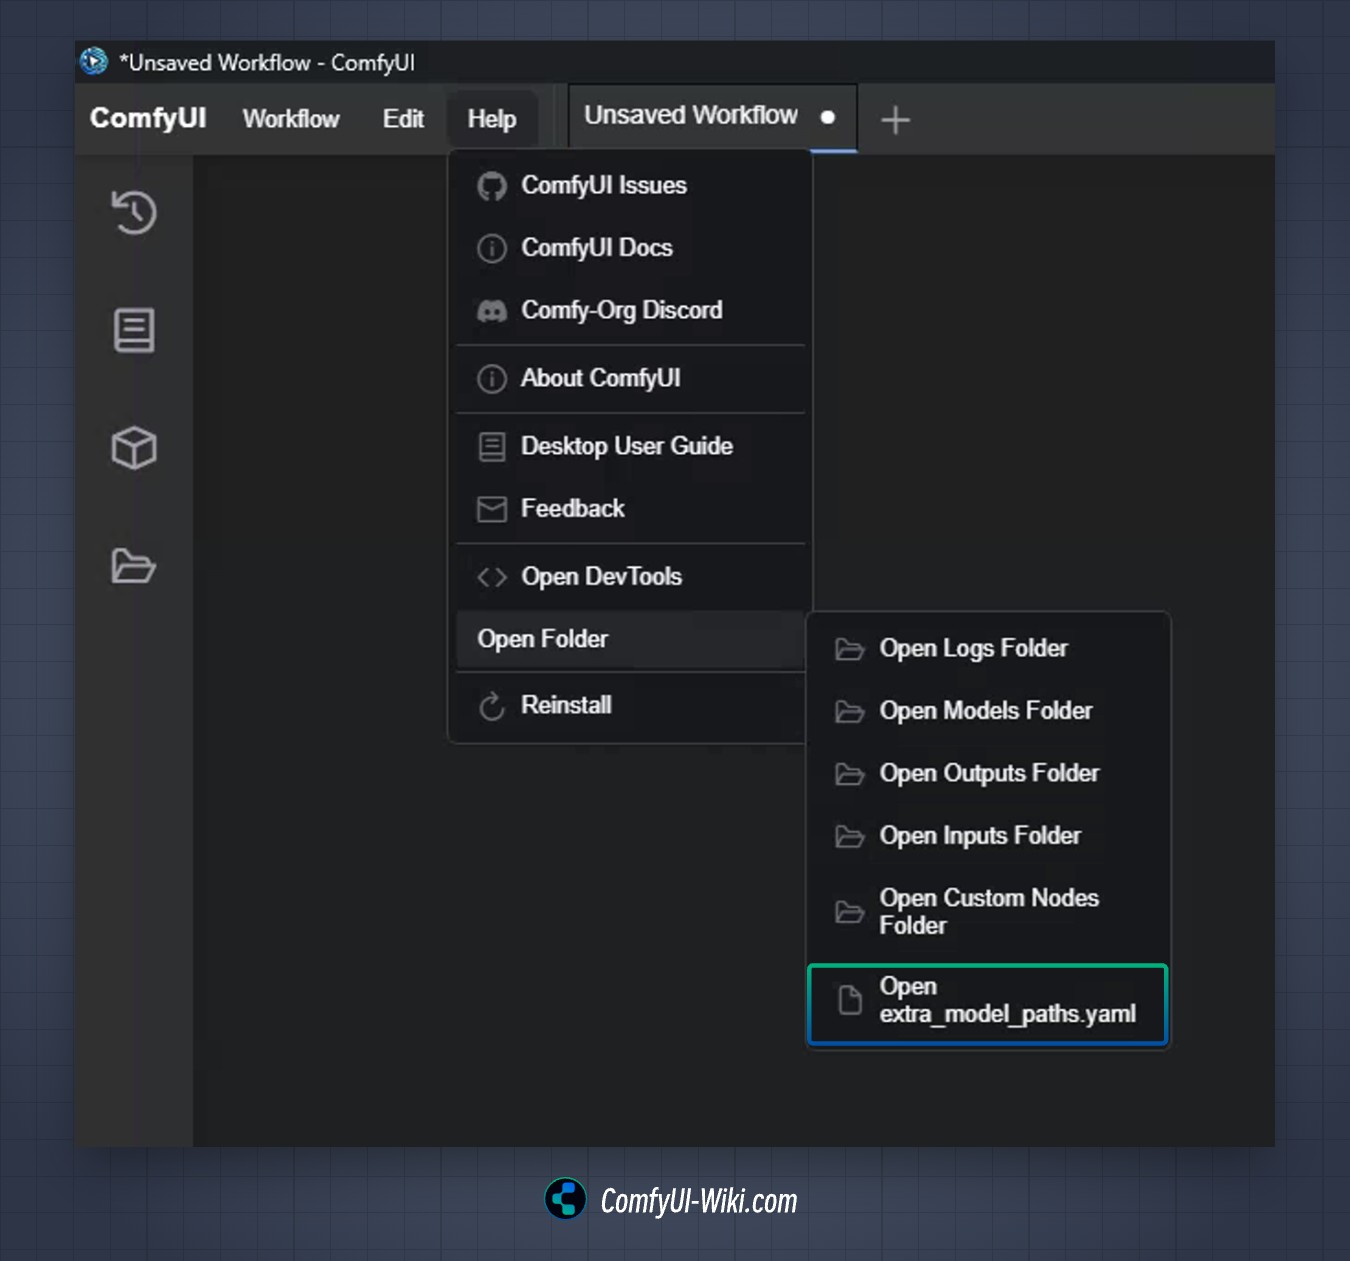
Send the image to inpaint, mask the fault, and set inpaint only masked so the region is processed at full resolution and pasted back. That single setting is why small areas like hands and eyes come out sharp. Denoising strength around 0.6 to 0.75 is the working range. If a result is bad, generate again with the same mask for a new seed. For stubborn hands, a ControlNet pose or depth guide steers the fingers.
Honest limit: real setup and a learning curve. This is the power-user path, not the quick fix.
The classic offenders, fixed
Four problems account for most of the images I salvage. Each one has a repeatable fix.
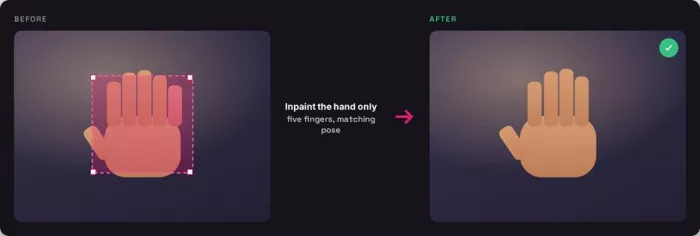
■ Hands and fingers
● Mask one hand at a time, and include a little of the wrist and the space around it so the model has context.
● Keep the region prompt simple: a human hand, five fingers, natural proportions, matching the pose. Push the usual excludes into the negative prompt.
● Turn on inpaint only masked so a small hand renders at full resolution rather than a few muddy pixels.
● If one finger is just too long, mask that finger alone. Several light passes beat one aggressive pass.
● For a mangled hand gripping a complex object, paste a reference hand in Photoshop or Krita as a visual guide, then do a ControlNet-guided inpaint over it.
■ Garbled text and logos
● Do not fight bad text with rerolls, because raw generation rarely spells reliably on any given run.
● Mask the text and, in the edit prompt, type the exact words you want to see.
● Reach for a text-aware editor here. Nano Banana and generative fill handle short labels far better than a base generation.
● Keep the phrase short. A few words land cleanly; full paragraphs still fall apart.
■ Faces and eyes, especially small or distant ones
● Mask the face and inpaint at low to mid strength so the identity holds and you do not get a stranger.
● For a plasticky or over-smooth face, a dedicated face restore or a faithful upscale that rebuilds skin texture is often cleaner than another roll of the dice.
● Fix eyes as their own small region if the face is otherwise good; mismatched or crossed eyes rarely need the whole face redrawn.
■ Stray objects and extra people
● Select the object, expand the selection by a few pixels, leave the prompt blank, and remove.
● Photoshop’s Remove Tool in Auto mode or a blank Generative Fill both do this well.
● Work on a new layer so you can paint black on the layer mask to bring back any part the fill got wrong.
Settings that decide whether a fix looks seamless
A repair either blends invisibly or announces itself with a soft seam. These are the knobs that make the difference, and where I tend to land on each.
| Setting | What it does | Where I land |
|---|---|---|
| Selection size | Too small starves the model of context; too big redraws things you liked | Fault plus a small margin (20 to 50% in Midjourney) |
| Inpaint only masked | Renders the region at full resolution for fine detail | On, for small areas like hands and eyes |
| Denoising strength | Low keeps the original and its flaw; high invents freely and may drift off style | 0.6 to 0.75 for most repairs |
| Selection expand | Adds breathing room so fills blend at the edges | Roughly 3 to 10 pixels |
| Variations per run | More attempts, more chances at a clean one | Generate 3 to 4, keep the best |
| One change per turn | Isolates the edit so the rest of the frame stays put | Always, in conversational tools |
Soft or low resolution overall? Upscale, do not inpaint
If nothing is broken and the whole image is simply soft or too small, inpainting is the wrong tool. Upscaling either sharpens the pixels you already have or invents new plausible detail, and the two behave very differently. A faithful upscaler respects the existing content, which is what you want for a face, a logo or a product shot. A creative upscaler hallucinates fresh texture like skin pores and fabric weave, which can look spectacular but may change a face or add detail that was never there. One honest caveat worth repeating: none of them can rescue genuine motion blur or a shot that was truly out of focus. They reconstruct from what is present. They do not invent a photo that never happened.
| Upscaler | Approach | Best for | Watch out for |
|---|---|---|---|
| Topaz Gigapixel | Faithful | Portraits, products, print where accuracy matters | Conservative; will not invent missing texture |
| Upscayl (Real-ESRGAN) | Faithful, free and local | Web and social enlargement on a budget | Basic interface; will not rescue heavy blur |
| Magnific AI | Creative, generative | Reinventing soft AI art, adding believable detail | Can alter a face’s geometry or add elements |
| Nano Banana Pro | Conversational, up to 4K | Editing and enlarging with strong text control | Newer; output varies with the prompt |
When repairing is the wrong call
I repair by default, but I have learned to cut my losses quickly. There is a stitched quality to an over-patched image that a fresh one does not have, and you can feel it before you can point to it. If the underlying anatomy is broken, a torso that connects wrong or a limb that melts into another limb, if the perspective of the whole scene is off, or if three or four inpaint passes each trade one problem for another, I stop and regenerate. A clean generation almost always beats a heavily rescued one. The fastest fixers I know repair locally and stop early. They do not try to save every frame.
When to stop Broken anatomy, collapsed perspective, or three failed passes are the signal to regenerate from scratch. A clean roll beats a heavily patched frame every time.
The workflow in six steps
1. Look first, and name the single thing that is wrong out loud.
2. If it is one region, mask it or describe it and regenerate only that.
3. Keep the selection tight to the fault plus a small margin.
4. Change one thing at a time, roll three or four variations, keep the best.
5. If the whole image is soft, upscale instead of inpainting.
6. If anatomy or perspective is broken, or three passes have failed, regenerate.
The verdict, after a lot of images
After enough time doing this, the reflex to regenerate has mostly left me, and my keep rate has climbed because of it. The shift that mattered was small: treat a nearly finished image as a photograph to retouch, not a lottery ticket to scratch again. Once I started masking the one broken part instead of gambling the whole frame, pictures that used to end up in the trash became finished work in a couple of minutes.
If you take one habit from this, make it the diagnosis step. Before you touch anything, say what is actually wrong. Nine times out of ten it is one hand, one word of text, one stray object, or one soft patch, and every one of those has a targeted fix that leaves the rest of your image alone. Save the reroll for the cases that truly earn it, the broken anatomy and the collapsed perspective, and you will spend far less time generating and far more time finishing. The tools have quietly gotten good enough that the last five percent is no longer where good images go to die. It is just the part you learn to fix.
Comments